
In 2006-2007 I recorded a song called “Standing on High” using n-Track Studio v.2.3 on Windows 98. (More info about the song here.) Here is my 2007 mixdown:
Now in 2019 I am getting close to finally completing the album this track was intended for. Some years ago I switched my entire audio workflow over to a Linux environment and upgraded my hardware setup, and I have been really pleased with the audio quality of my current tools. (For the record: Linux Mint 19.1, Ardour 5.1, 2nd generation Focusrite Scarlett 2i2, various LV2 plugins.) Since then I have improved my skills at mixing and mastering, so I decided to revisit “Standing on High” to see if I could improve its sound.
One of the problems with the old mixdown was a stereo delay effect I used on the lead vocals which produces a comb filter when you play the song through a single speaker. One of my goals for the remastering was to fix this problem.
I was also partly inspired to do this project by a track posted by English Guy to the LinuxMusicians forum, which was a 2019 remastering of a 2005 recording. My comment to English Guy was:
“Wow! The difference between the old and new versions is stunning. The mixing levels are better, the drums are better, the instrument tones are improved. Better all around in the new mastering. Fine work!
“As Wallace once said to Gromit, ‘It’s surprising what a lick of paint’ll do.'”
First, a disclaimer: this is not exactly a tutorial, because I don’t claim to be an expert at this. I am like the kid who learned to ride a bicycle yesterday, now teaching his little brother how to do it today. My goal here is to simply document my own stumblings and meanderings through this process, in hopes that it will be interesting or useful to you. If you are an expert in this area and can share some tips and pointers with me and my readers, then please do so in the comments below!
Step 1: Try it the Easy Way
My first approach was to take the 2007 mixdown and apply a stereo enhancer and a few other things like EQ, a touch of reverb, and a limiter. I was able to get it sounding a bit better than the original, but I still wasn’t totally pleased. In order the remove the comb filter effect on the lead vocal I had to apply so much of the stereo enhancer that it was negating all of my stereo panning on the other tracks. I also wanted to adjust some of the individual track levels and pan settings, and it’s just not possible to do that with a final mixdown. What I needed was to work with the original source files.
Step 2: Get the Source Files
I went digging through my digital archives and found the original project files for the song. In my sessions through 2006-2007 there was a lot of cutting and splicing of different takes on the tracks, and I didn’t want to have to recreate all of that by ear. Much easier would be to do a stem export from n-Track Studio. But unfortunately (or is it fortunately?), I no longer have a computer that is capable of running it. I tried to install that old dinosaur on a couple of dual-boot machines, but the installer program crashed in Windows 7 and Windows 10. What to do? Install Wine!
I am not a huge fan of running Windows binaries on Linux, mostly for philosophical reasons but also because random things tend to fail, performance suffers, and the visual appearance of the non-native application is often terrible. But my only other option was to find an old computer and install Windows 98 on it, and I wasn’t about to do that. So I installed Wine and was very pleased when the n-Track Studio install program ran without a hitch. Once it completed I fired up n-Track Studio and was suddenly transported back in time by over a decade:
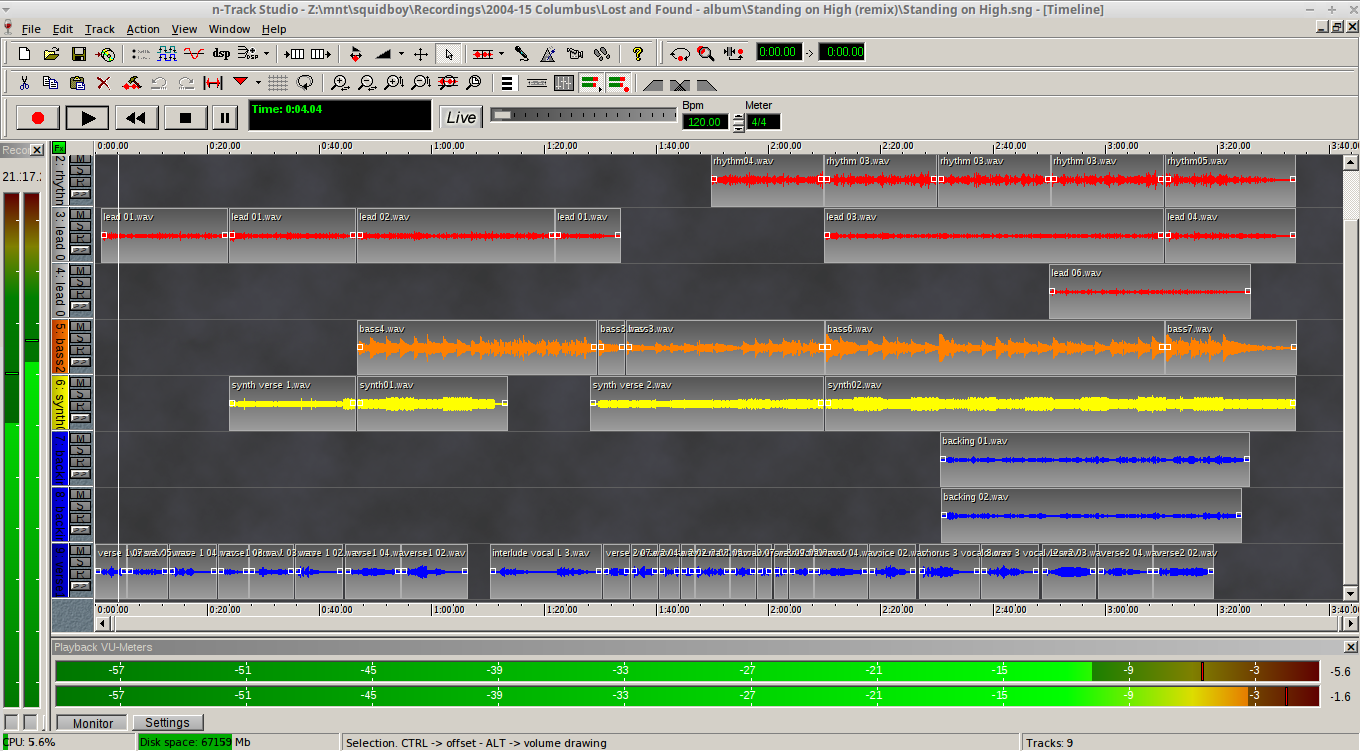
Oh, the number of hours I spent staring at that program during my college years! After I found and installed my old VST plugins n-Track loaded the “Standing on High” project file, and the audio output even worked! But the program would crash frequently, and the interface was slow as molasses, so it took me an hour or so to export all of the tracks. (In retrospect I think most of the performance problem was because the source wav files were on the network drive.)
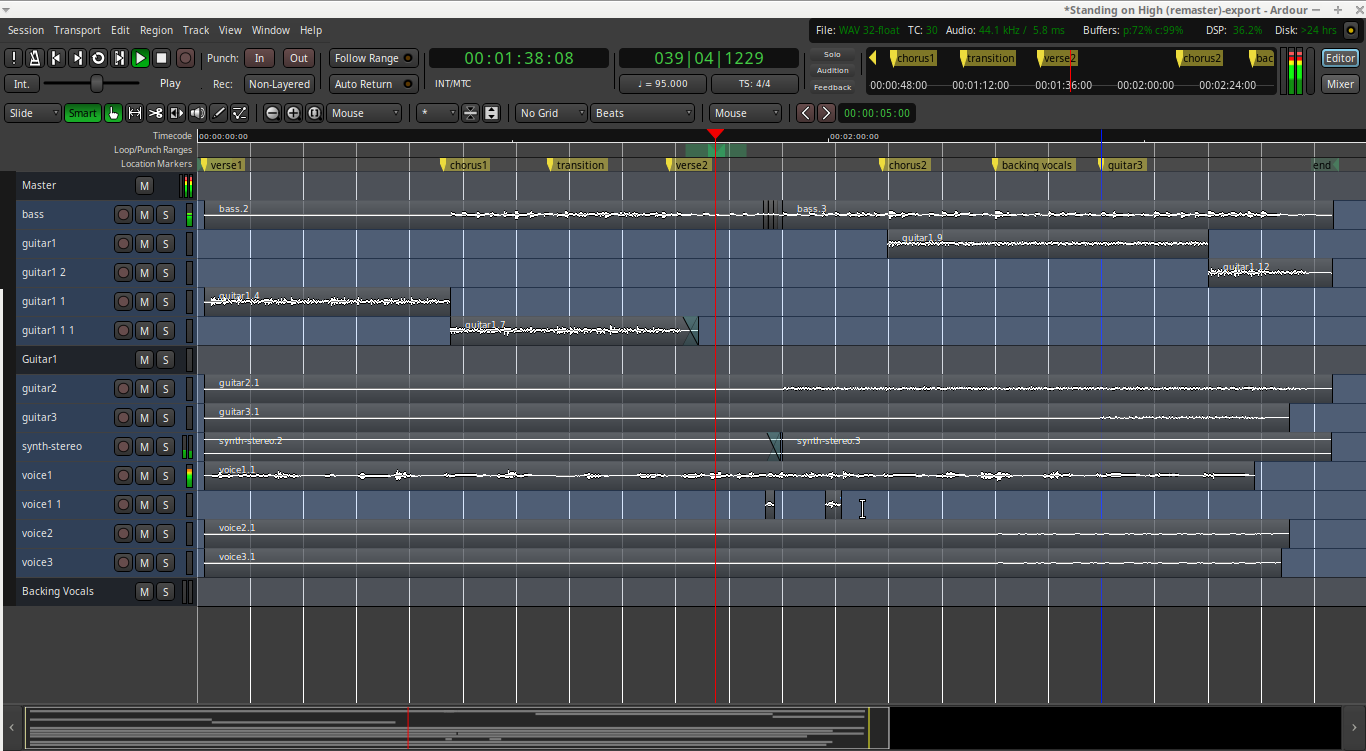
Once I got all of the tracks exported I loaded them into a new Ardour project and started to mix them. Again I was pleased with the sounds I was getting from the Linux environment, and I was starting to get a glimpse of how much better this remastering was going to be.
Step 3: Noise Repellent
But the more I worked on it the more I became aware of a high-pitched noise that was coming from several of the tracks. In fact, on closer inspection there was a different kind of noise on almost every track.
Enter Noise Repellant. I had heard about this tool on a Linux audio forum, so I found its website and figured out how to install it. This was a little intimidating because it involved compiling software from source code, which I never do, but I decided to give it a try. Thankfully the process was relatively easy, once I got all of the dependencies in place. The install instructions on the website were adequate but not written for newbies, so I had to get some background on a few things before I knew how to do them.
Here is a quick tip for those of you who never compile software from source: I learned that you need to have the development packages of dependencies installed. Noise Repellant requires the Fastest Fourier Transformation in the West (fftw3), which was already installed on the system, but I kept getting a compile error that said fftw3 was unavailable. But once I installed the libfftw3-dev package the compile worked without a complaint. Also, the Meson build system was in the apt repository for my distro so I didn’t have to install through pip like the instructions on the Github page said.
Noise Repellent doesn’t come with a lot of documentation, but its controls are fairly intuitive. The most important controls are the switches you can see on the left side of the window in the screen shot.

- When the top switch is active the plugin will learn the noise profile from the audio played through the track. For this mode I looped about 1-2 seconds of the “cleanest” noise I could find.
- The adaptive noise learn switch I found to be less useful because it would generally filter out too much of the signal I wanted. I contacted the developer, who indicated that it is common to lose precision using this method.
- The third switch will reset the previously-learned noise profile so that you can retrain it.
- The fourth switch lets you hear what is being filtered out.
Applying noise repellent really did wonders to the sound, and I was very impressed with how effective it was. But I noticed that for one track, the main guitar, the noise profile evolved over the course of the song so that by the time we had reached the end the noise profile was so different that it sounded like I hadn’t done anything at all. I tried splitting this track into sections and moving these into separate tracks that all fed into a single audio bus. Then each individual section of the track could have its own Noise Repellent profile.
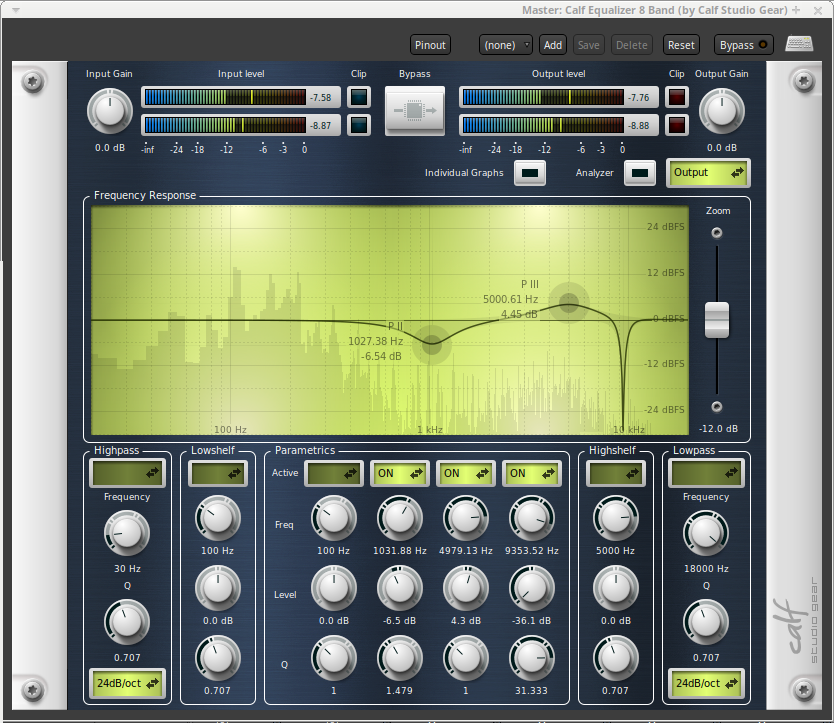
Step 4: Stomp on the Last Little Bug with a Graphic Equalizer
After all of this work there was still a bit of noise at about 9000 Hz which would come and go as the song played, and its frequency would drift a little bit. I could’t figure out what track it was coming from, and anyway I had already applied Noise Repellent to all of them. So I placed a graphic equalizer on the master bus with a narrow band cut out around that frequency, and widened it slightly until that noise was gone.
Step 5: Reimagine the Mix
Next is where I got to play artist again, moving the sounds around in the stereo mix until I felt there was good balance. I used the 2007 mix as a general guide, because I think I did a reasonable job then, but I did change a few things around. I used the master bus EQ to lower the midrange frequencies a bit, which tends to open up some sonic space and bring the voices forward in the mix. I also placed a compressor and limiter on the master bus to help with the dynamic balance as instruments come in and out of the song. The main guitar riff needed a bit of softening in the treble range, so I took that down a bit with another EQ. Also I made a small change to the arrangement during the second verse to add to the dramatic effect just before the second guitar comes in.
To help me keep things in perspective I would periodically export the song, and then place it side-by-side with the 2007 mixdown in Audacity so that I could quickly switch between them. I got feedback from members of my family, and played my mixdowns on as many different speaker systems as I could. This process continued over several days until I stopped making any more changes and felt like it was as good as I could get it.

For the record, here is a list of the plugins I used:
- Noise Repellent
- Calf Studio Gear:
- Calf Compressor
- Calf 8-band Equalizer
- Calf Vintage Delay
- Dragonfly Reverb
- x42 Digital Peak Limiter
- Guitarix
The Final Result
Here is the result of all this work:
For perspective, here is a short clip where I switch back and forth between the 2007 and 2019 versions:
While I was playing this for my wife and switching between the old and new versions, she said that it sounded like a new recording. I said to her with a smile, “See? I haven’t been wasting my time down here!” It’s not perfect, and not as good as an actual re-recording, but after all of this work the sound quality is miles ahead of where it was before the remastering, and I think this track can proudly take its place on the album.
A Quick Progress Report
Speaking of the album, I have recently been remastering several of the older tracks, and I am pleased with the results overall. I think the album will have a fairly unified sound, but with enough diversity to keep it interesting. When the dust settles on these remastered tracks I will start on the title track of the album, which I have been saving for last.
Recent Posts

Variation 30 from Goldberg Variations, by J.S. Bach, BWV 988
A surf rock adaptation of a classic keyboard tune by J.S. Bach.
Read more


S2E2 – Pity Party: A Retrospective
Tom and Alan go down memory lane about the making of the 2020 pandemic-era “Pity Party” album in Season 2 Episode 2 of the Conversations in Stereo podcast
Read more